Introduction
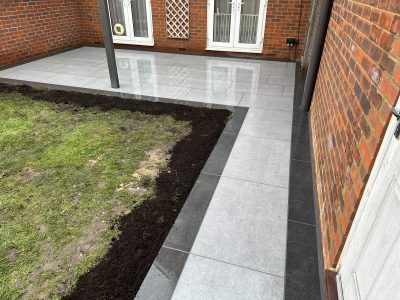
Porcelain tiles are a versatile and durable choice for outdoor spaces. They are resistant to frost, scratches, and stains, making them an excellent option for patios, walkways, and other outdoor areas. However, laying porcelain slabs outside requires a certain level of skill and knowledge to ensure a successful installation. This blog post will guide you through the process step by step.
Preparation: The Key to Successful Installation
Before you start laying porcelain slabs outside, it’s essential to prepare the area properly. This involves clearing the space of any debris or obstacles that might hinder your work. If you’re replacing old tiles, make sure you remove them completely along with any adhesive residue.
Next, measure your space accurately to determine how many tiles you’ll need. It’s always a good idea to buy extra tiles in case some break during installation or for future replacements.
Once your area is clean and measured, it’s time to prepare your base. For outdoor installations, a mot type 1 scalping layer is sufficient fully compacted to help support the new poercelain slabs
Choosing the Right Adhesive for Laying Porcelain Slabs
When it comes to laying porcelain slabs outside, choosing the right adhesive is crucial. Not all adhesives are suitable for outdoor use or compatible with porcelain tiles.
A flexible cement-based adhesive is typically recommended for outdoor porcelain tile installations. This type of adhesive can withstand temperature changes without cracking or losing its bond.
Remember to mix your adhesive according to the manufacturer’s instructions for optimal results.
Laying Your Porcelain Tiles
Now that your preparation is complete and you have the right adhesive on hand, it’s time to start laying your porcelain slabs.
Start by applying a layer of primer slurry on to the back of each slab before laying and a nice 2-3mm thick layer is sufficient
Next, place your tile onto the cement and press down firmly. Make sure it’s level by using a spirit level. If it’s not, adjust it by adding or removing adhesive as needed.
Continue this process until all your tiles are laid. Remember to leave space for grout between each tile. This can be achieved by using tile spacers.
Grouting Your Tiles
Once your tiles are laid and the adhesive has had time to set (usually 24 hours), you can start grouting.
Choose a grout that’s suitable for outdoor use and mix it according to the manufacturer’s instructions. Apply the grout into the spaces between your tiles using a grout float, making sure it fills them completely.
After applying, wipe off any excess grout from the surface of your tiles with a damp sponge before it dries.
Conclusion
Laying porcelain slabs outside may seem like a daunting task, but with proper preparation and patience, you can achieve professional-looking results. Remember that preparation is key, from choosing the right adhesive to ensuring your base is flat and level. By following these steps carefully, you’ll have a beautiful outdoor space that will last for years to come.
